When we use an App iPhone, there will be a problem that the rear camera doesn't work. What should I do? It may be a system crash, software or hardware failure. This article shares some solutions for the iPhone 8 camera not working black screen.

Part 1: Fix rear camera on iPhone 8
1.Check if "Not Enough Storage" on iPhone
Maybe iOS updates or downloads take up a lot of memory space, and the phone doesn't have enough storage space, so iPhone 8 camera not saving photos.
You can free up space by storing photos and videos in iCloud or computer.
2. Restart iPhone
If the phone has not been restarted for a long time,it may cause crash and program errors, which will make you think that the iPhone camera cannot be opened.
2.1 Press and quickly release the Volume Up button.
2.2 Press and quickly release the Volume Down button.
2.3 Press and hold the Side button (aka power) until you see the Apple logo.
3. Update latest iOS for iPhone 8
If your iPhone is running an older version of iOS, you may encounter some program conflicts and may cause back camera black screen on iPhone 8.
3.1 Open the "Settings" app.
3.2 Click "General".
3.4 Click on "Update".
If an update is available, click Install Now.
4. Restore settings when iPhone 8 camera not working after update
Open the iPhone "Settings" -"General" - "Restore" to restore the factory settings.
How to Back up your iPhone with iTunes:
4.1 Plug the Lightning connector (charge cable) on your iPhone.
4.2 Plug the other end of the Lightning cable into the USB port on your computer.
4.3 Open iTunes on your computer.
4.4 Click the iPhone icon in the top left corner of iTunes.
4.5 Click "iCloud" to choose whether you want to back up your iPhone to iCloud or your computer.
4.6 Click "Back up now" to back up your iPhone.
After the backup is complete, you will see the time and date of the update under "Latest Backup".
How to Reset iPhone 8:
1) Go to the "home screen".
2) Open the "Settings" app.
3) Click "General".
4) Use your finger to scroll down to reset. It will be the last option in Settings -> General.
Tap Reset all settings.
5) Enter your password.
6) Tap "Erase All Content and Settings". You will be prompted twice.
A progress bar will appear on the screen.
5.Restores your iPhone in DFU
DFU can fix software problems by removing code that can cause problems. The hardware code is rewritten, so software problems such as iPhone camera can’t take photos may be resolved.
How to Get iPhone 8/8 Plus/X in DFU mode:
Step 1. Turn off the iPhone 8/8 Plus and connect it to your computer via the USB cable.
Step 2: Press and hold the Power button and the Volume Down button simultaneously for 10 seconds.
Step 3: While continuing to hold down the volume down,release the Sleep/Wake button.
If you do it the right way, your iPhone will be in DFU mode, even though it is still black on the screen.
6. Use another camera software
Uninstalling a third-party app that has a camera function, check if the camera is occupied cause the iPhone camera is not available. If it is determined that no other program is occupying the camera,download and use other camera application.
Part 2: iPhone 8 Camera not Working after Screen Replacement
A slight tear in the camera's flexible cable or a new screen contact problem. With the screen installed, the camera cable bends back,so slight fracture may be separated. So, we need to check the parts that are most likely to cause a camera malfunction.
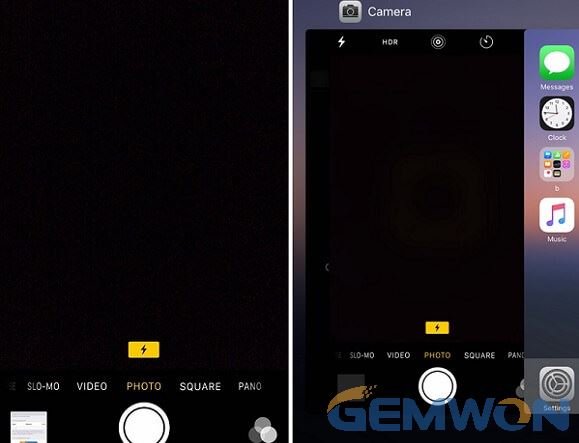
Part 3: iPhone 8 Camera Flash doesn't Work
When taking photos in dim lighting, you need to turn on the flashlight when shooting. However, if the camera flash doesn't work on iPhone, the camera will not shoot properly and black screen.
You need to following steps:
Step 1: Swipe up to display the "Control Center".
Click on the flashlight.
If the flashlight is not turned on, then clean the flash lens and make sure there are no obstructions on the lens. Or check for possible malfunctions of the flash.
Step 2: Open the iPhone camera and click on the flashlight icon in the upper left corner, making sure to click "On".
Step 3: Go to Settings > Privacy > Location Services. Allows the camera to access the location.
Step 4: Press and hold the power and home button(iPhone 7/7 Plus's power and volume down buttons) to restart the iPhone.
Part 4: iPhone 8 Camera Won't Focus
One of the most common iPhone camera problems is that iPhone camera won't focus and blurred.
If you are trying to take a picture and the iPhone camera won't focus, the camera lens may be damaged. But if the lens looks fine,check for possible problems by following method.
1. Remove the back case or items that may block the lens.
2. Clean the camera lens. In other words, try to check the camera lens for dirt or dust and clean it when needed. You can wipe the camera lens with a microfiber cloth.
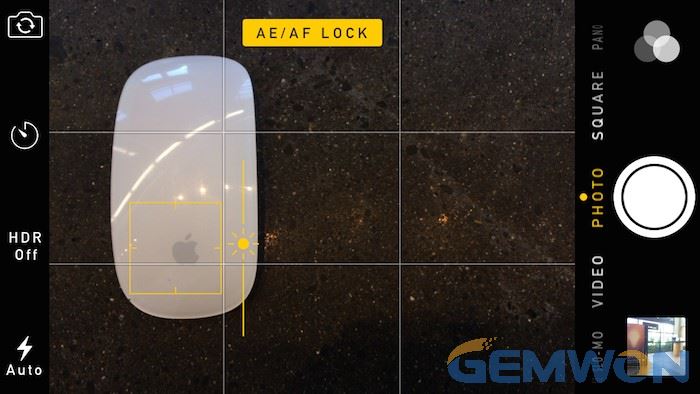
3. Enable auto focus lock.
One of the best features of the camera app is auto focus and auto exposure. This is a feature designed to help the iPhone camera focus.
To activate it, simply tap and hold the object you want to focus until the AE/AF prompt
appears.
4. Check the rear camera lens for scratches. If so,you may need to purchase the replacement iPhone 8 camera from the Apple Store or purchase it yourself.
5. If your iPhone camera doesn't focus and blurred,try the troubleshooting method in Part 1.
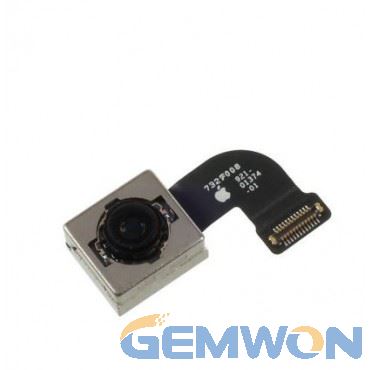
Part5: iPhone 8 Rear Camera Replacement
If you need to replace the iPhone 8 camera, you can purchase the iPhone replacement parts you need with GMEWON and replace the iphone 8 rear camera according to the following steps yourself.
1. Turn off the iPhone before starting disassembly.
2. Remove the two 3.5 mm Pentalobe screws from the bottom edge of the iPhone.
3. Install a suction cup in the lower half of the front panel and above the home button.
4. Pull the suction cup up at a constant pressure to create a slight gap between the front panel and the rear case.
5. Reinsert your tool into the lower right corner of the iPhone, then slide it to the top right of the corner and slide it up to separate the adhesive.
6. Gently pull up the suction cup, lift the bottom edge of the display, and pull the small piece on the suction cup to remove it from the front panel.
7.Slide an opening pick underneath the display around the top left corner and along the top edge of the phone to loosen the last of the adhesive.
8. Gently slide the display assembly down to release the clip that secures it to the rear case.
9. Swing the monitor up from the left to open the iPhone
10. Remove the four Phillips screws that secure the lower display cable bracket to the logic board and remove the bracket.
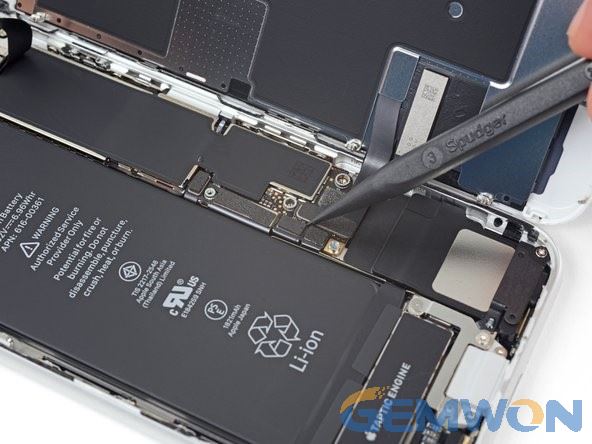
11. Use the tip of the spudger to pry the battery connector out of the socket of the logic board.
12. Use the tip of the spudger to pry the lower display connector out of its socket.
13. Use the point of a spudger to disconnect the second lower display cable.
14. Remove the three 1.3 mm Phillips screws that secure the bracket to the front panel sensor assembly connector and remove the bracket.
15. Disconnect the front panel sensor assembly connector using the point of the spudger and remove the display assembly.
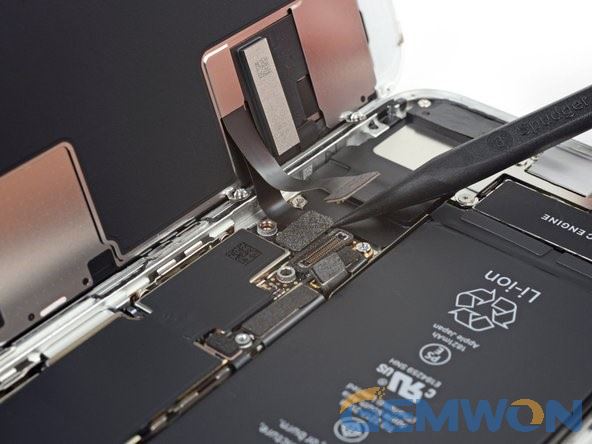
16. Use the flat end of the spudger to pry the camera cable connector straight up from the socket to disconnect the connector.
17. Remove the two screws that secure the rear camera bracket. Remove the rear camera bracket.
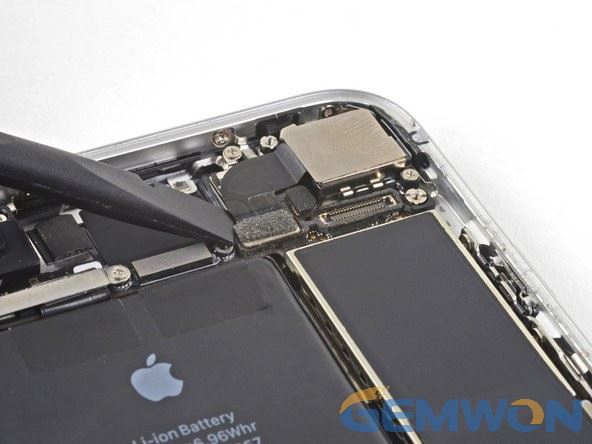
18. Lift the rear camera up vertically from the groove to remove it.
The steps to disassemble the iPhone 8 camera are completed here, and the disassembly process is not easy, but it can save a lot of camera maintenance cost compared with in the repair shop.
All the above solutions can fix the iPad / iPhone camera not working. If you have tried all the solutions but the iPhone 8 camera cannot take pictures, we recommend you contacting your nearest Apple Service.
Related Articles:
How to Fix Samsung Camera not Working
How to Fix iPhone 7 Plus Camera not Working

