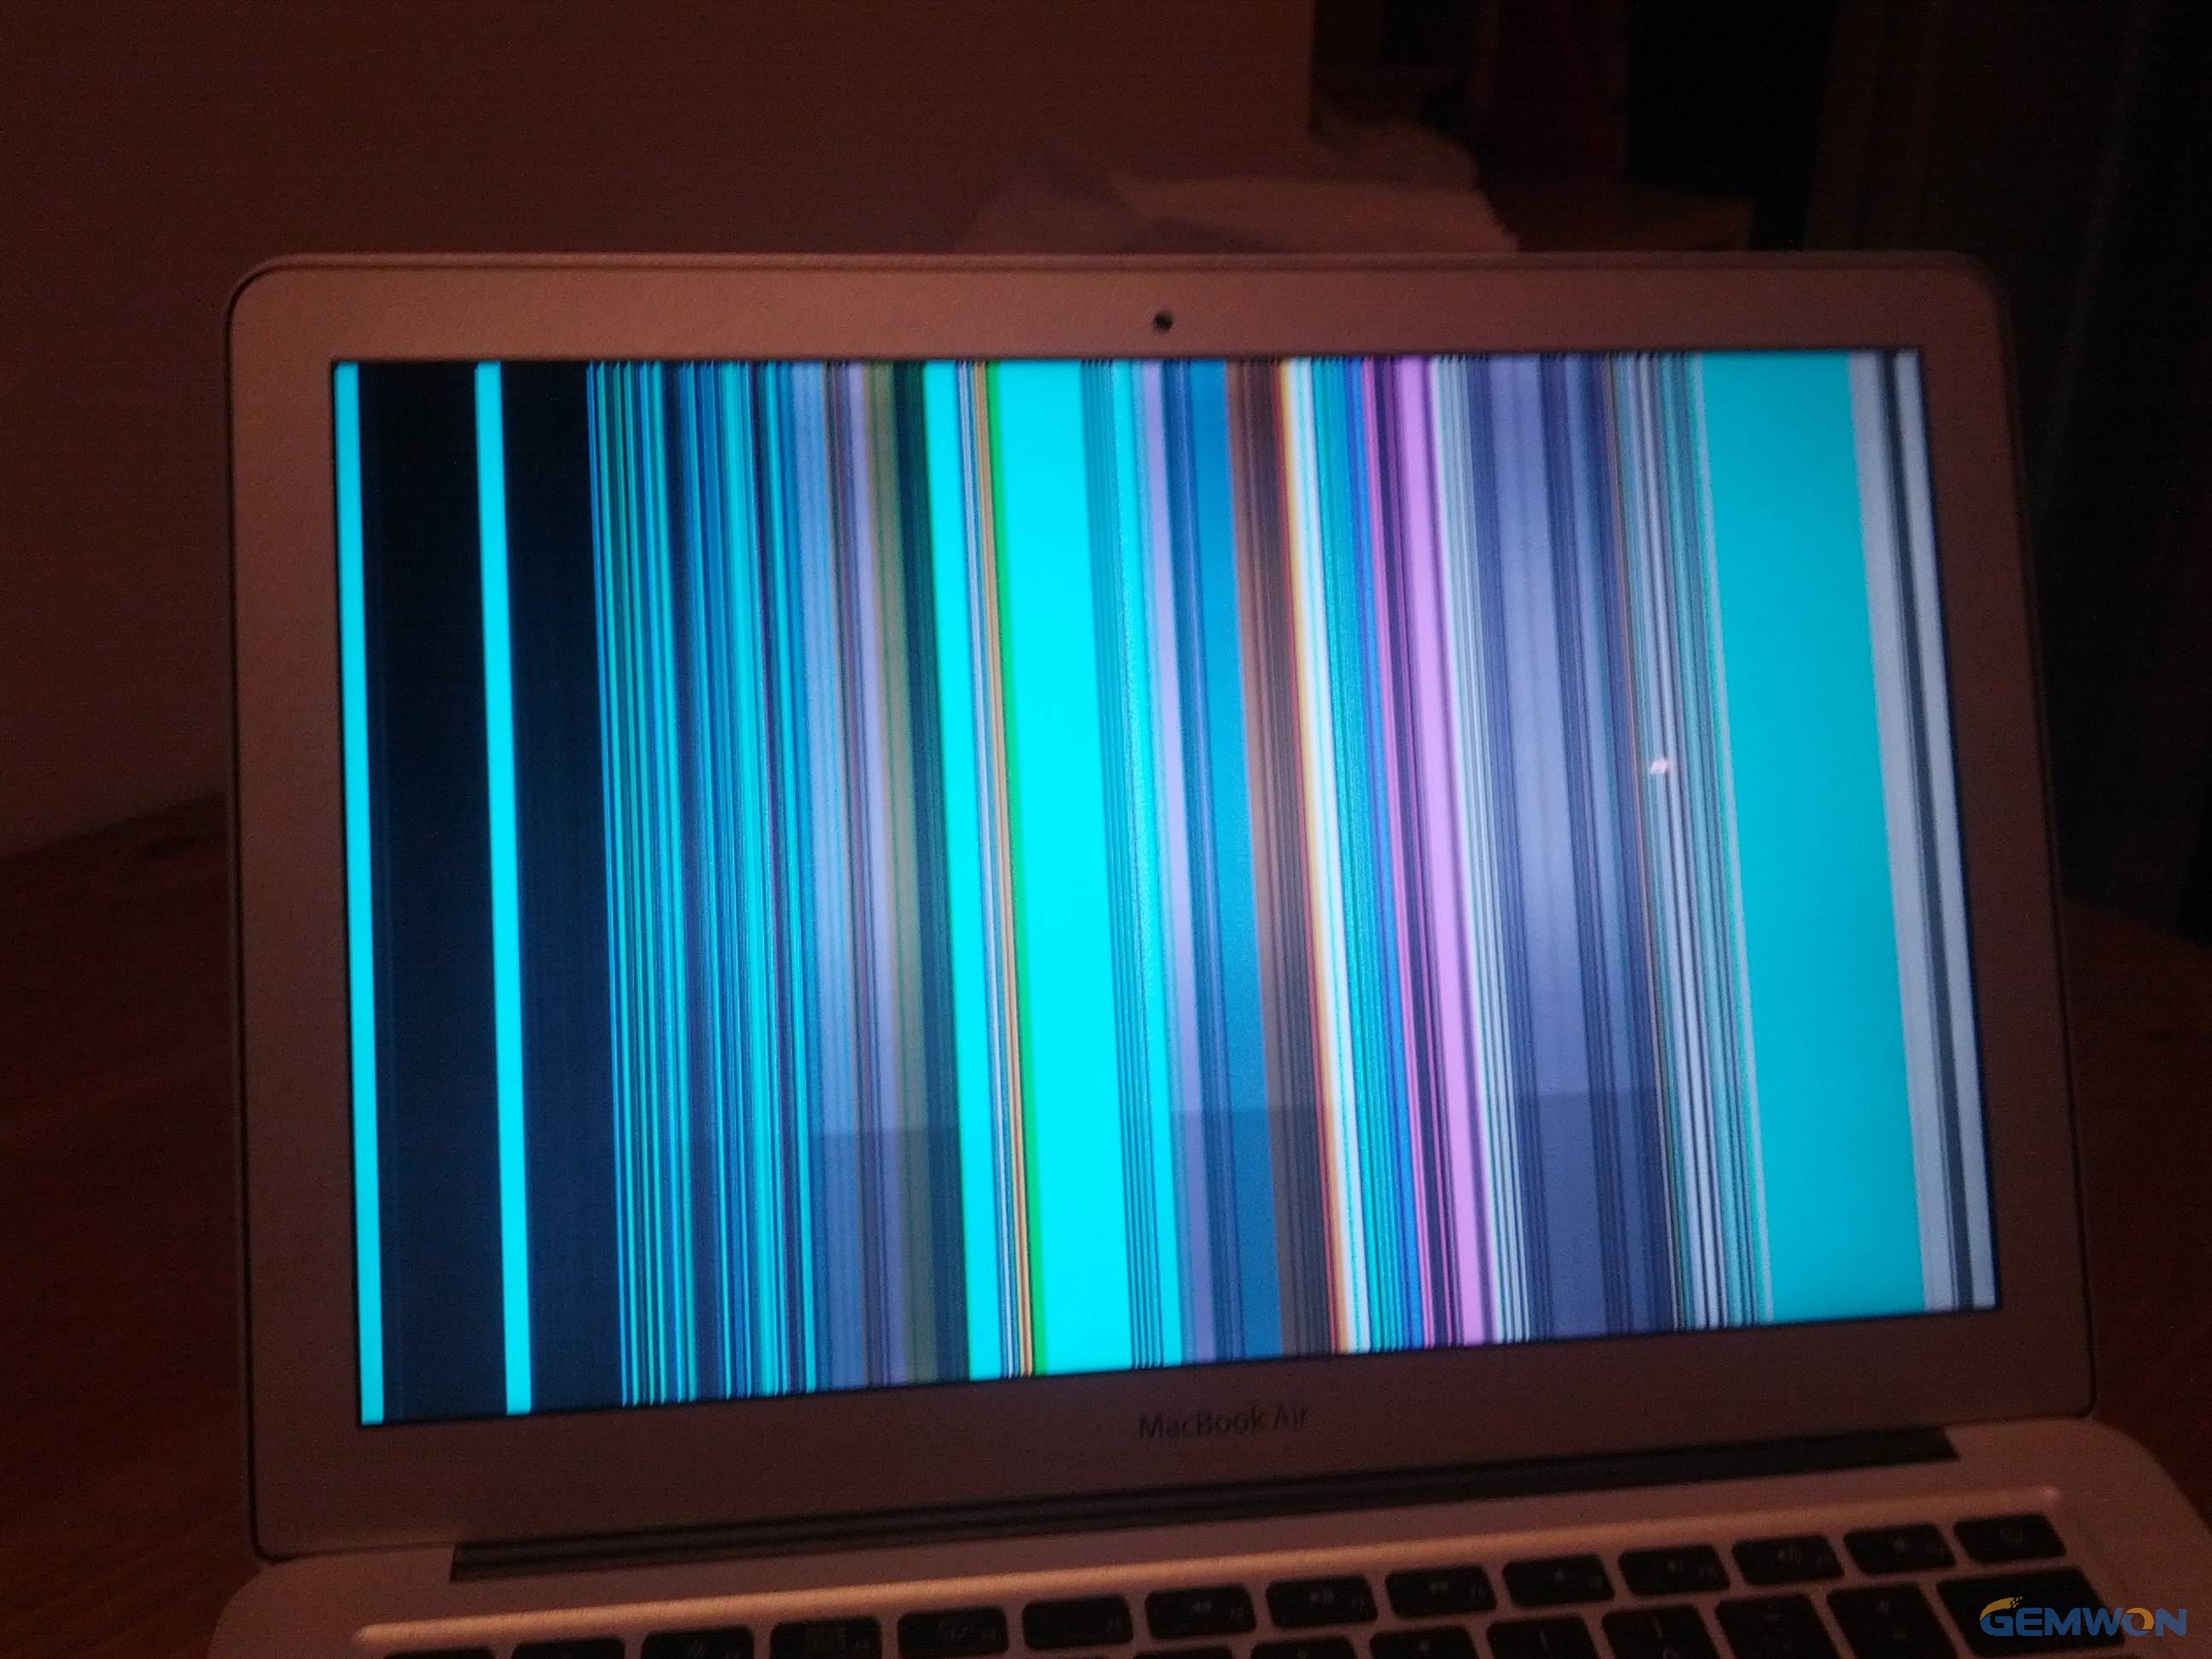
If the screen on your MacBook has broken with lines displayed, don’t repair in the first place.Try to diagnose by yourself and find possible solutions. It is possible that accidents like this are relatively cheap and easy to fix. A repair from Apple is not the only option you have, especially when your MacBook is out of warranty.Moreover, if the lines on your MacBook’s screen are caused by accidental damage such as got dropped, Apple will not cover the cost for fixing. In this tutorial, we will help you to diagnose and repair MacBook screen lines.

Step 1: Diagnosing Hardware or Software Cause Screen Lines on MacBook
To diagnose if it is a software or hardware, try connecting the MacBook to an external monitor.If the external monitor displays the screen properly, then your MacBook must have the problem (It's a hardware issue). If both the external monitor and the MacBook still show flickering lines on the screen, it is a software issue.
Step 2: If It is Software Problem
Check any new software you've added, including MacBook OS software updates, to see if they have any known issues with your MacBook model or with software you're using. Restart your MacBook in normal mode, and then run your MacBook with only basic apps, such as email and a web browser. If all works well, add any apps you use that may have helped cause the MacBook screen lines issue one at a time. Continue until you're able to repeat the problem, which narrows down the software cause.
However, if you still have graphics issues without opening any apps, and the graphics issues were gone when running in Safe Mode, try removing startup items from your user account, or create a new user account for testing.
Steps 3: If It is Hardware Problem
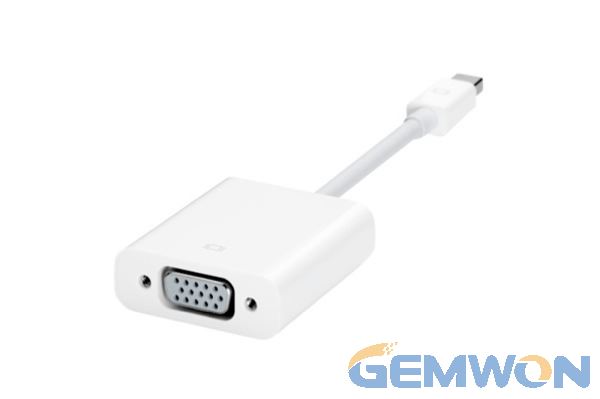
1. Try to Use An External Monitor
There are plenty of monitors out there at reasonable prices which will allow you to still use your MacBook. To attach your MacBook to an external monitor you may probably need a Mini-Display to VGA Adapter. You can buy a brand new one from Apple. Alternatively, there are also non-official adapters, but these may not work as smoothly. However, the method of using an external monitor and connecting it to your MacBook is only really a short term fix for MacBook screen lines appearing.
2. Fix it Yourself
The second and possibly the cheapest of all is to fix the screen yourself. Simply search "MacBook Screen Replacement" in online shopping sites will give you various options. Here we provide DIY steps for you to replace the screen by yourself.
- Using a hairdryer, carefully heat the edges of the screen to remove the adhesive binding it to the device.
- Next,gently affix the suction cup tool to the corner of the screen, pressing down until it seals.
- Pull up on the ring of the suction handle to lift the screen away from the body of the computer.
- Then, use your microfiber cloth to wipe down your screen’s surface, as well as the inside of the new screen you are applying.
- Prepare your new screen by removing the coverings of the adhesive strips.
- With your hairdryer, heat the adhesive strips as evenly as possible on your new screen.
- Position the new screen atop your MacBook Pro, properly aligning it along the edges of the device.
- Gingerly press down on the edges of the screen using your microfiber cleaning cloth to seal the adhesive.
- Remove the protective cover of the new screen by peeling it off.
- Finally,secure the adhesive by reheating the edges of the screen with your hairdryer,and then pressing down one last time.
- If you’ve followed these steps correctly, your new screen should be fastened in place.
Conclusions:
When your MacBook screen displays vertical or horizontal lines, don't assume you're going to break the bank fixing it again. In this tutorial, I've outlined a number of different ways in which you can overcome a MacBook screen with lines.
Related Articles:
How to Fix Frozen Laptop Screens
The Most Cost-Effective Way of Laptop LCD Screen Repair
Fix Laptop Screen and Laptop Screen Replacement Cost

