If you encounter MacBook screen broken and need a replacement, you may be inclined to head straight to the closest official Apple Store. And while the Apple experts obviously know what they are doing, be prepared to pay a pretty penny. Think you’re adept enough to tackle a MacBook screen replacement yourself? There are some new MacBook screens available for purchase from third-party providers.Here we would like to show you how to repair a MacBook broken screen.

Broken Glass or LCD?
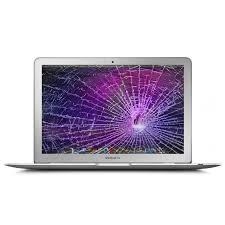
Before you decide to replace the whole screen for once, you need to diagnose whether it’s just a broken glass instead of a broken screen. The most common type of screen breakage on a unibody MacBook or MacBook Pro is glass damage. The glass cover is actually one piece of thin glass, sandwiched between two layers of plastic film. This means that when your MacBook screen glass breaks, little pieces typically will not fly everywhere (this is a good thing), but rather, the screen will "spider-web" with cracks showing up all over.
If your MacBook is broken, it would be cheaper and easier to fix. If your MacBook unibody glass looks OK, but your screen looks like it has ink blotches on it, chances are you have broken your LCD screen.
Steps for MacBook Screen Replacement
Here we provide guide to repair MacBook cracked screen LCD rather than the entire display assembly for MacBook Pro 13" Unibody Mid 2010. The steps for other MacBook models are similar.
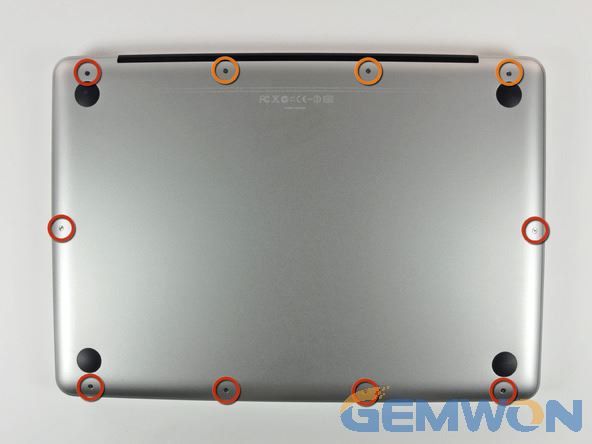
1.Remove the following 10 screws securing the lower case to the MacBook Pro 13"Unibody:
- Seven 3 mm Phillips screws.
- Three 13.5 mm Phillips screws.
Slightly lift the lower case and push it toward the rear of the computer to free the mounting tabs.
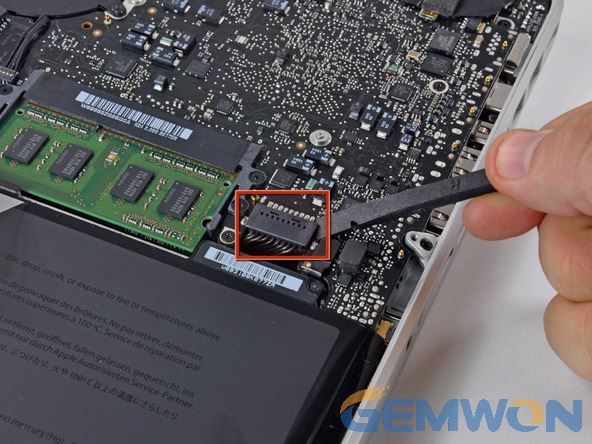
2.Use the flat end of a spudger to lift the battery connector up out of its socket on the logic board. For precautionary purposes, we advise that you disconnect the battery connector from
the logic board to avoid any electrical discharge.
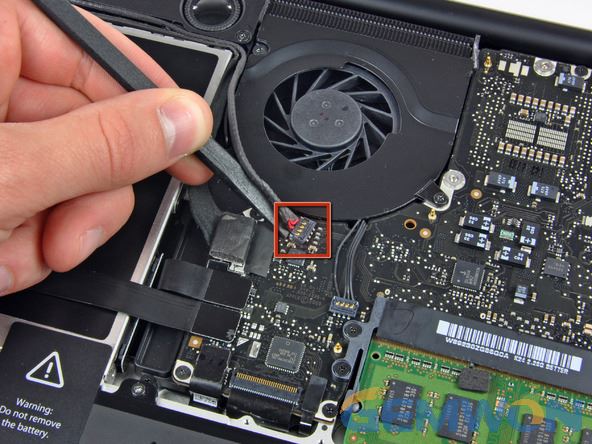
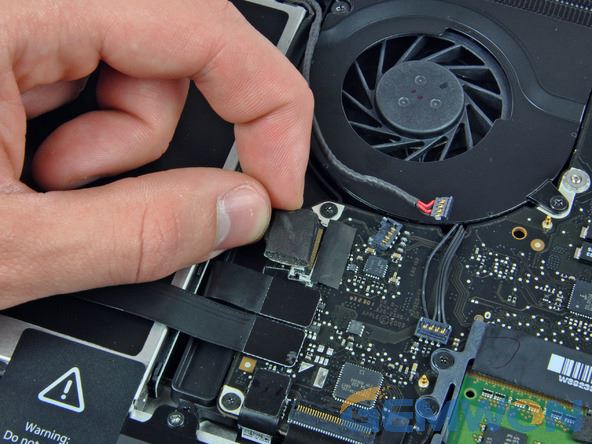
3.Use the flat end of a spudger to pry up the subwoofer/right speaker cable connector out of its socket on the logic board. Grab the plastic pull tab secured to the display data cable lock
and rotate it toward the DC-In side of the computer. Pull the display data cable connector straight away from its socket. Make sure to pull the connector straight away and not straight up
from its socket.
4.Disconnect the camera cable by pulling the male end straight away from its socket. Make sure to pull the connector parallel to the face of the logic board and toward the optical drive,
not straight up from its socket. De-route the camera data cable from the channel in the optical drive. Remove the following screws:
- Two 10 mm Phillips screws
- One 3.8 mm Phillips screw
Slide the camera cable bracket out from under the subwoofer and remove it from the computer.
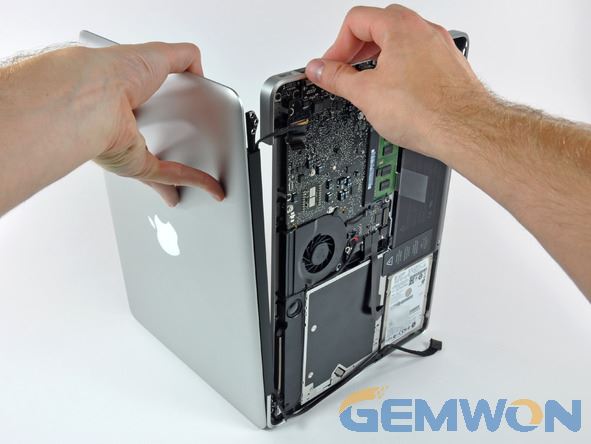
5.While holding the display and upper case together with your left hand, remove there maining 6.5 mm T8 Torx screw from the lower display bracket. Remove the last remaining T8 Torx
screw securing the display to the upper case. Lift the display up and away from the upper case, minding any brackets or cables that may get caught.
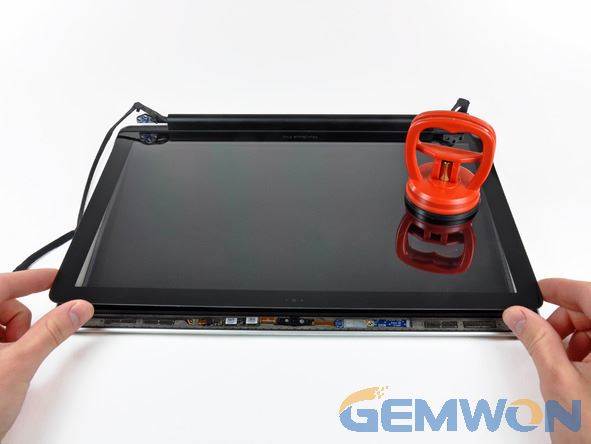
6.With the heat gun set to low, start by heating the outer black border near the upper right corner of the glass panel. Gently lift the corner of the display glass enough to insert a spudger
between it and the display assembly. Continue working along other edges of the front display glass until it is separated from the display.
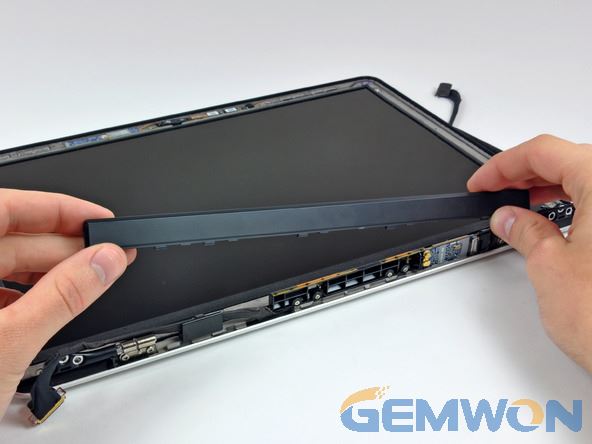
7.Slide the clutch cover toward the right edge of the display. Starting at its far right end, rock the clutch cover along its long axis while pulling it away from the clutch hinge. Working from
right to left, carefully continue to release and lift the clutch along the lower edge of the display assembly. Lift the clutch cover up off the front bezel and set it aside.
8.Remove the following six screws securing the LCD panel to the front bezel:
- Four 3.25 mm Phillips with large heads.
- Two 3.2 mm Phillips with small heads.
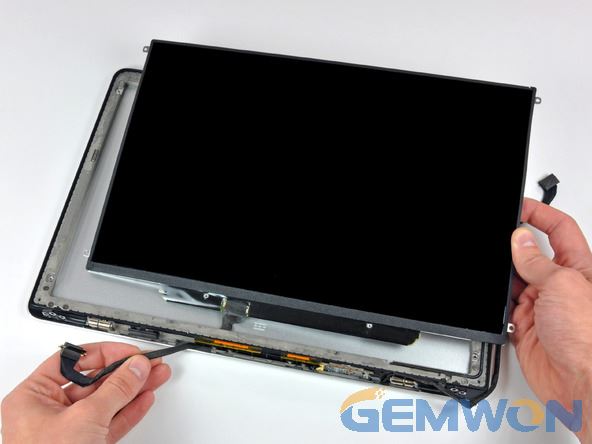
Pull the LCD toward the top edge of the display to slide the circuitry along its lower edge out of the recess in the aluminum display assembly.
Conclusions:
Both the MacBook glass screen cover and LCD screen are available for self-repair and with installation. It just depends how handy you are, or who you know that might be able to help you perform the repair. However, if you over-estimate your dexterousness, you could end up inflicting more damage on your device, costing you more in the long run.
Related Articles:
How to Fix Broken Computer Screen
Simple Ways to Setting Moveable Laptop Screensavers
How to Purchase a New Laptop Screen

