We know that there are many ways to install windows on MacBook, and many users have this requirement. In this article, we will use the MacBook Pro to introduce how to install windows on MacBook.

1.Whether Your MacBook Pro Supports to Install Windows 10
If you want to install Windows 10 on your MacBook Pro, you need to make sure your MacBook model is compatible with Windows 10:
MacBook (2015 and later version)
MacBook Pro (2012 and later version)
MacBook Air (2012 and later version)
iMac (2012 and later version)
Mac Mini (2012 and later version)
2.How to Install Windows 10 on MacBook Pro
1.Install Windows 10 on your MacBook with Mac Boot Camp
This method can install windows 10 for MacBook free (not including fee for Windows), it is easy to install and update, built into your macOS, the disadvantage is that you need to restart your laptop to boot up windows.
2.install windows 10 to MacBook pro without bootcamp
Installing Windows 10 with a virtualization program is not free, although these applications do allow you try to use for free before purchase. The most popular virtualization programs include VirtualBox, Parallels, and VMware. Their advantage is that you can run windows10 and macOS at the same time and implement different system file exchanges.The disadvantage is that it is not cheap, does not provide update services, and requires a lot of storage space.
3.Steps to Install Windows 10 on MacBook pro with Bootcamp
1.Get a Windows disk image
First, you need to get a Windows disk image(ISO file) from the Microsoft website. It includes a 64-bit version of Microsoft Windows 10 Home or Professional. If you are installing Windows for the first time, please use the full version instead of the upgrade version.
2.Start Boot Camp
To launch the Boot Camp Assistant, go to Applications > Utilities Folder. Click "Continue" and Boot Camp for MacBook will automatically find the ISO file on your system. Then follow the on-screen instructions to re-divide your boot disk. This is very simple,just follow the prompt on the screen.
3.Create a partition for Windows
When you complete the assistant, your MacBook restarts to the Windows installer. If you're using a flash drive or optical drive to install Windows, you're asked where you want to install Windows.Select the BOOTCAMP partition, then click "Format". If you're not using a flash drive or optical drive, the correct partition is selected and formatted for you automatically.
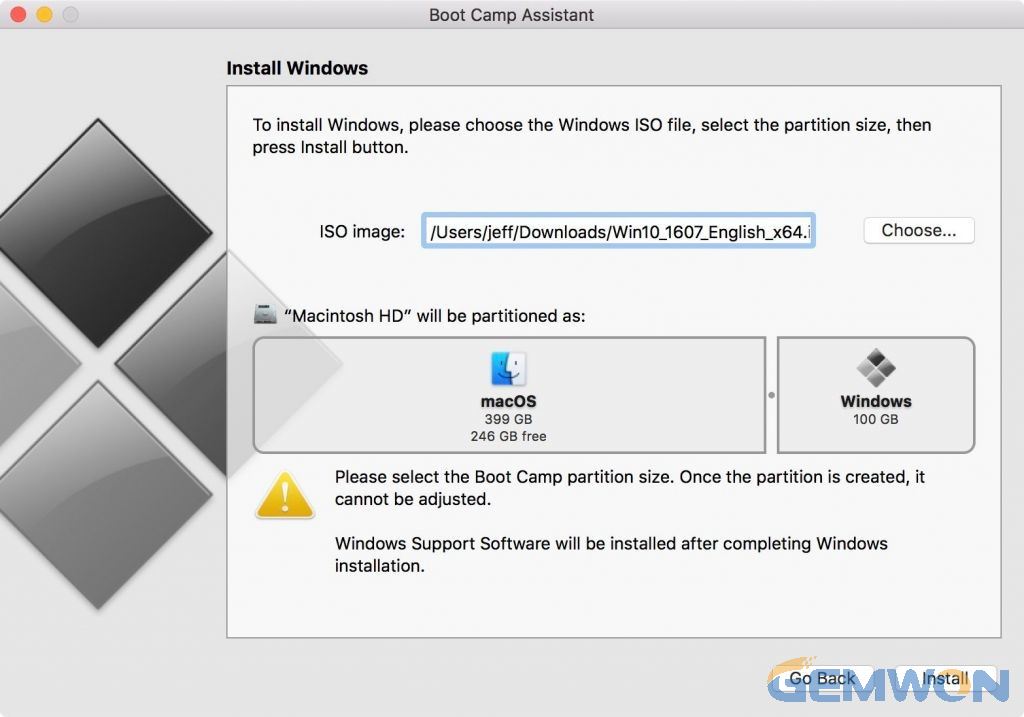
4.Install Windows
Next, follow the prompts to install Windows on-screen:

- Choose your ISO file and click the "Install" key
- Type your Password and click OK. You will see the Windows setup program
- Select your language
- Enter the product key or provide the windows key after the installation
- Select Windows 10 version and then click Next
- Click Drive 0 Partition X: BOOTCAMP
- Click Next to installed windows 10
- The other steps are the same as installing windows. Follow the prompts
- Choose whether you want to use the Cortana personal assistant or not. You can disable it by clicking “Not Now” button
- Here,Windows 10 can install into your MacBook Pro
5.Switch between Mac OS and Windows

After installing windows 10 for MacBook, it will still boot to macOS. To access Windows, you must turn your MacBook off and then turn it on while holding the "Option" key. You will be asked from which drive you’d like to boot. If you want to start MacOS, repeat the previous step, then press and hold the “option” (Alt) after powering up and select MacOS in the options.
4. Install Windows 10 Without Bootcamp
Install the windows on the virtual hard drive:
You need to install VMware Workstation in the current operating system and then install the Windows 10 into VMware Workstation of MacBook. This way you don't need to restart your computer when switching between windows and macOS, just open the VMware Workstation software. However,this method may require more than 16G of RAM and about 50G of hard disk space to run Windows 10 smoothly in VMware.
You can refer to this article:
How to Install VMware Fusion Virtual Machine on Mac
Summary:
If you need to install windows and macOS on MacBook pro, we recommend that you use Boot Camp to install Windows 10 on your MacBook, because it's free and easy to use, it doesn't take up memory space; When your MacBook has enough RAM and hard drive space and the features and specifications are good, it would be convenient to use, if you use VMware to install Windows on your MacBook.
Related Articles:
How to Diagnose and Fix Laptop Hard Drive is Broken
How to Fix Laptop Beep Codes Error Startup
How to Upgrade Laptop CPU without Replace the Motherboard

