Yesterday I dropped a small bucket of water next to it was my MacBook, and a few small splashes hit the keyboard. Now the 5 and the "t" button don't work.
This tutorial is suitable for the old MacBook keyboard, butterfly keyboard and its second generation, please refer to other tutorials... i spilled water on my MacBook keyboard what do i do?

How to Fix Water Damage MacBook Keyboard:
If you spill water or other liquid on your MacBook's keyboard accidentally, you need to clean the surface of the liquid quickly and turn off the power and remove the battery. Then open the lid of your computer and put it back up, let the liquid flow out slowly.
Don't turn it on within 72 hours - you need to make sure the MacBook is dry before starting. Some people may use a hair dryer, liquid may spread inside the assembly, causing more serious damage.
Mac have suffered from liquid, coffee, cola, which can corrode your computer's hardware for some time. So, you need to clean your computer right away.
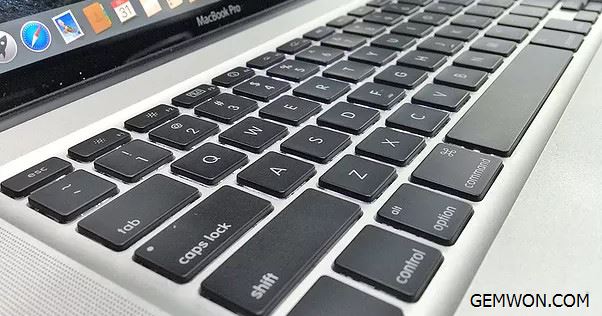
MacBook 2017 12-inch keyboard cola injure, clean sticky keys:
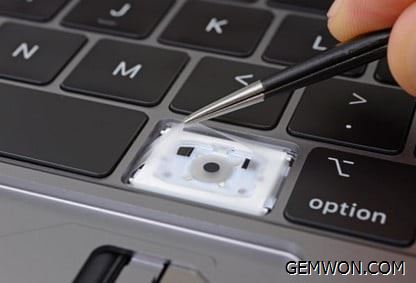
The first step is the keycap:
The tool for removing the key cap is the nail, it will not damage the keycap, and it will not drop the paint. This step requires more patience. The top two corners are pulled down and the lower two corners are pulled out.Because the buckles in the lower two corners are lateral, they will break off from below.
The second step is cleaning:
1. Take the keycap and wash it. Brush with a brush, rinse again, then dry with air.
2. Clean the inside of the keyboard. Damp the tissue paper with alcohol and then use a pair of tweezers to hold the paper ball for cleaning.
Third step:
press the keycap back. First, hold the keycaps and let the lower two buckles snap onto the bracket, then put the keycaps flat, and press the top two corners to install them.
And if the amount of water is less, it can be dried naturally, and the cola will lose its viscosity when it is dried for a long time.
Confirm which MacBook keys are not working after water damaged. If the MacBook power button is not working after spill or the entire keyboard is invalid, then replacing the keyboard is your best choice.
You only need to purchase a replacement keyboard that matches your notebook model. Follow the steps below to repair keyboard replacement for the water. The following is a replacement procedure for the 12" MACBOOK RETINA A1534 keyboard battery for the new MacBook and most models.
Main repair tools and accessories: Spare keyboard for MacBook, laptop repair tool kit
1. Shut down, unplug the power adapter,
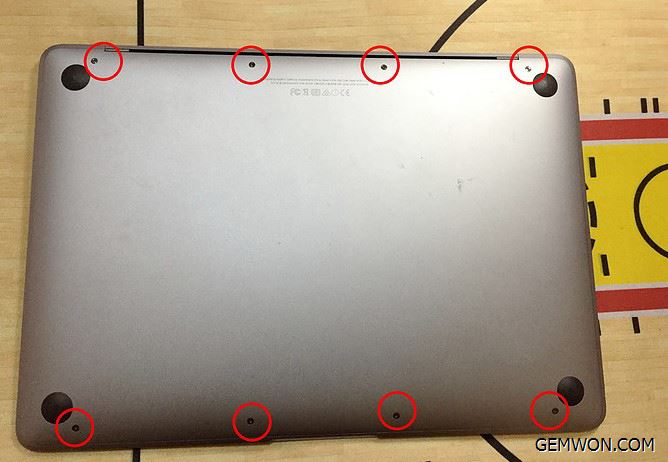
2. Remove the 8 screws on the back panel,
3. When disassembling the rear case, do not open it immediately. The back shell is placed at 45° by hand.
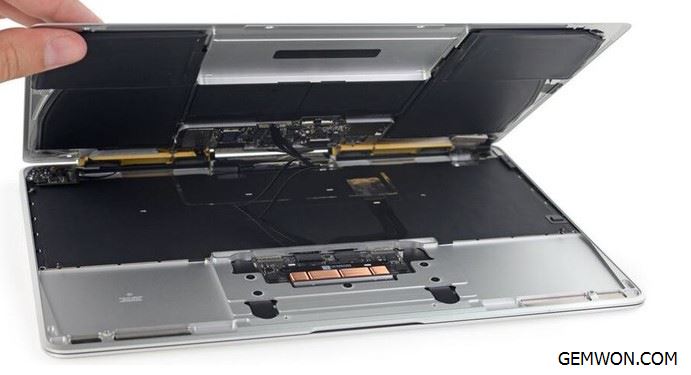
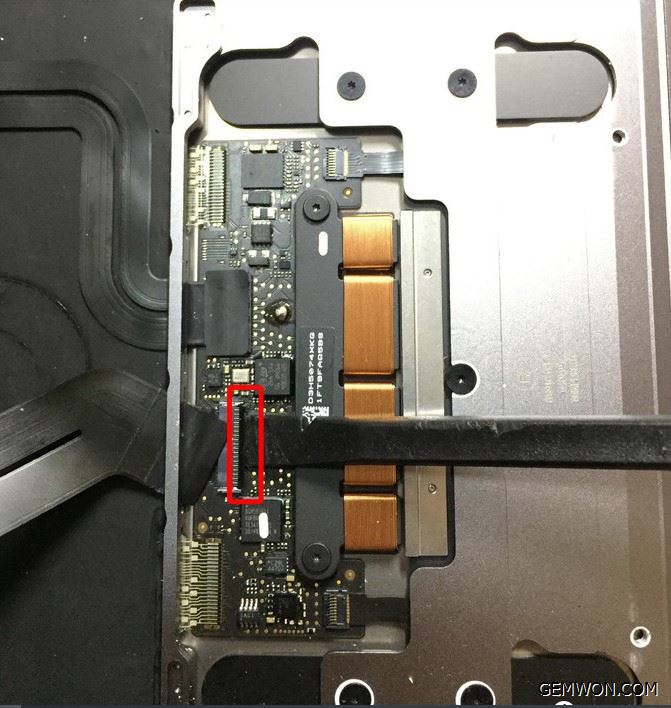
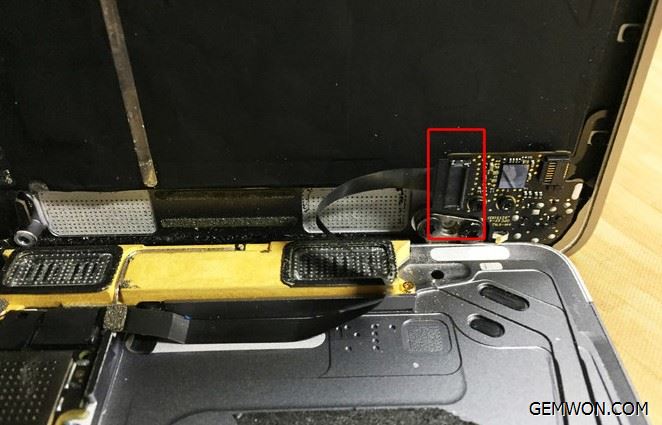
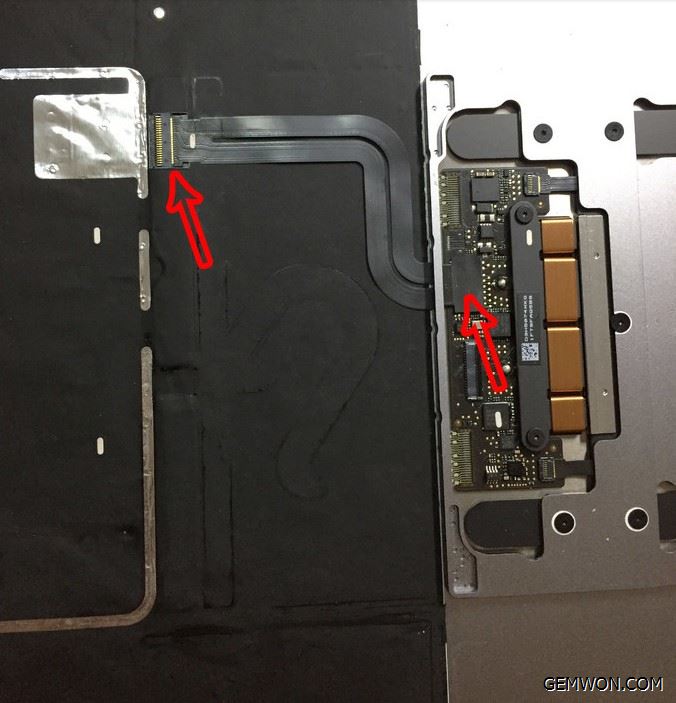
4. Tear off the tape of the cable slowly, then pick up the red pressure bar in the picture and the cable will pop up. At this point, the rear shell can be opened at 90°, because there is a cable connection at the back, it is recommended not to lay flat.
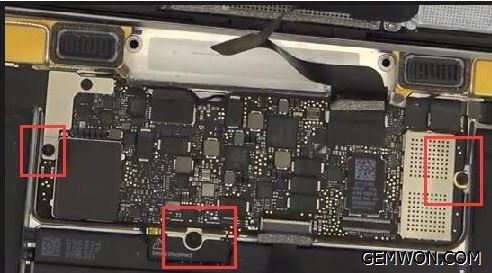
5. Remove the three screws from the picture and the cable that you just removed. At this time, the motherboard at the bottom can be loosened, but do not remove the motherboard immediately.
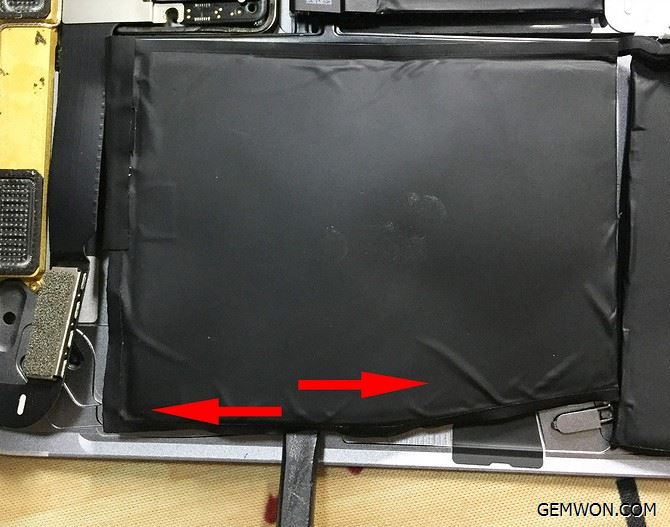
6. Apple's original battery is very tightly disassembled. For 12-inch MACBOOK RETINA A1534, change the battery and keyboard. Do not use brute force to remove the tape to avoid excessive deformation and battery explosion. Use a crowbar to loosen the area where the battery sticks.
7. Pull out the motherboard.
8. Go up here and you can remove the battery.
9. When disassembling, there are three cables connected to the bottom case of the computer, and the three cables are removed to completely separate the bottom case from the notebook.
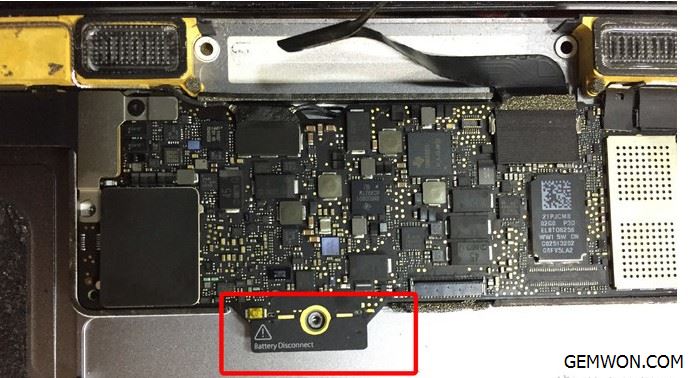
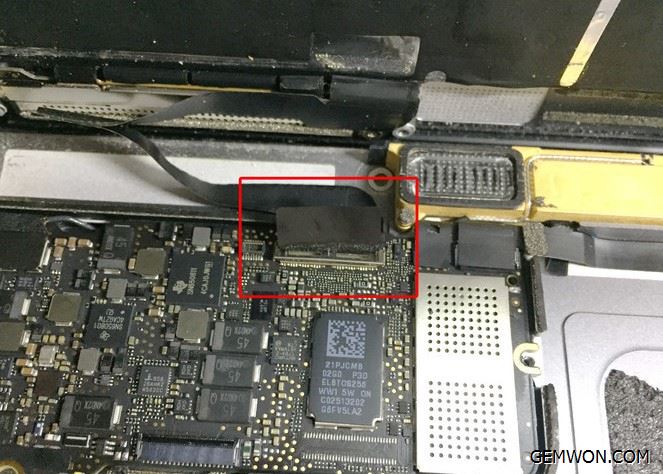
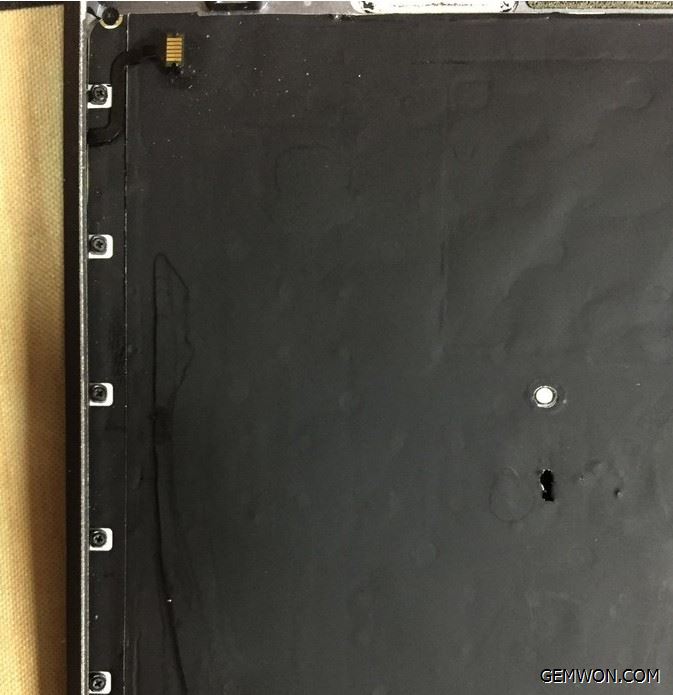
10. Disconnect the right cable and open the tab in the red position in the figure, just like the first cable.Gently pull out the cable with your hand.
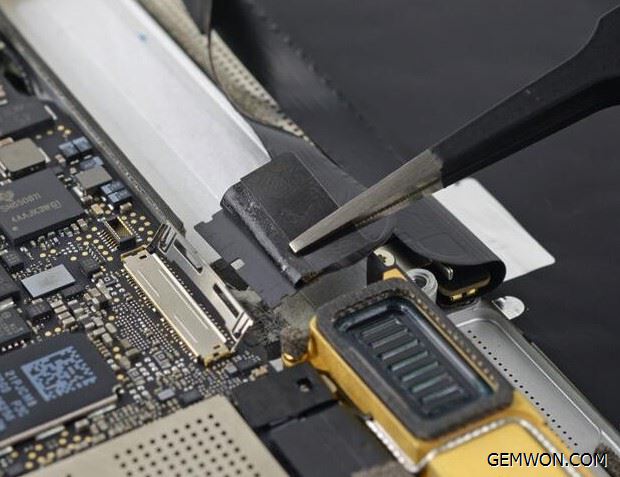
11. In the middle of the cable, firstly remove the black tape attached to it. When it is uncovered, the tablet will be opened and carefully cut off.After the glue is removed, the cable can be slowly pulled out.
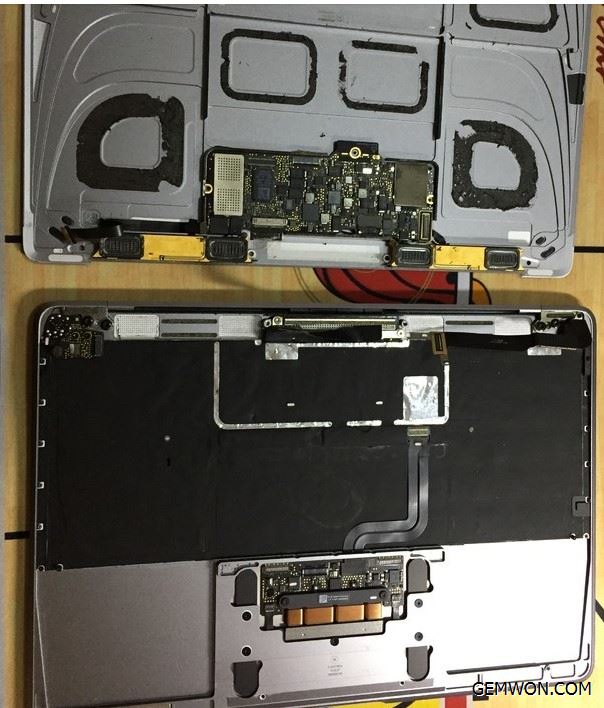
12. Unpack the remaining screw and loosen it with a tweezer. At this time, the bottom case has been completely separated from the notebook.
13. Where the left cable is removed, remove the two screws and cables identified in the figure, and the headphone module can be removed.
14. Remove the keyboard cable and remove it as above.
15. Remove the screws on both sides of the keyboard. The place with the screws can be removed.
16. Remove the right cable.
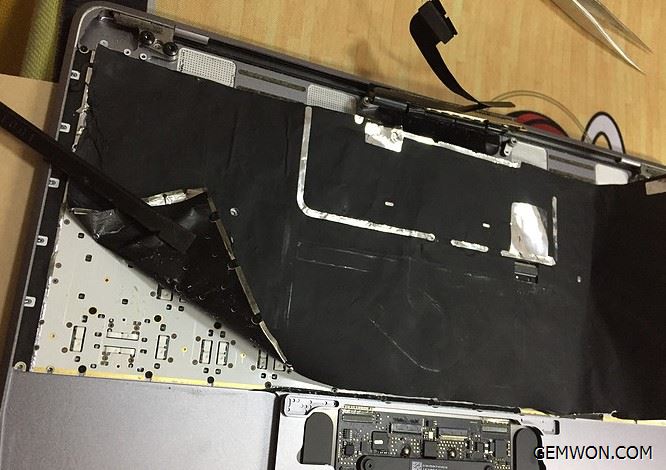
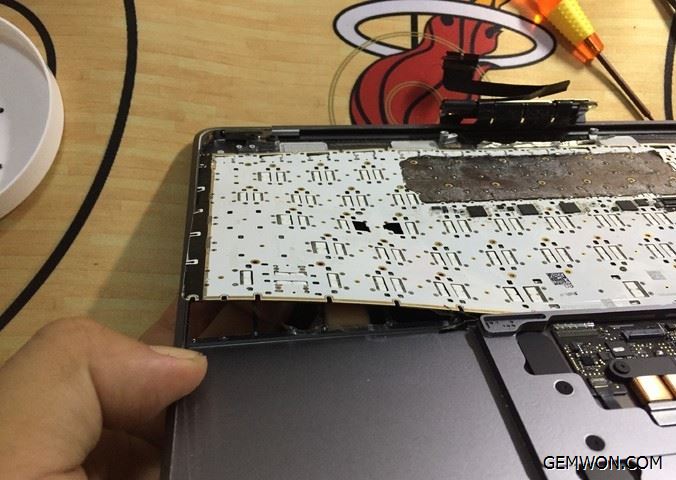
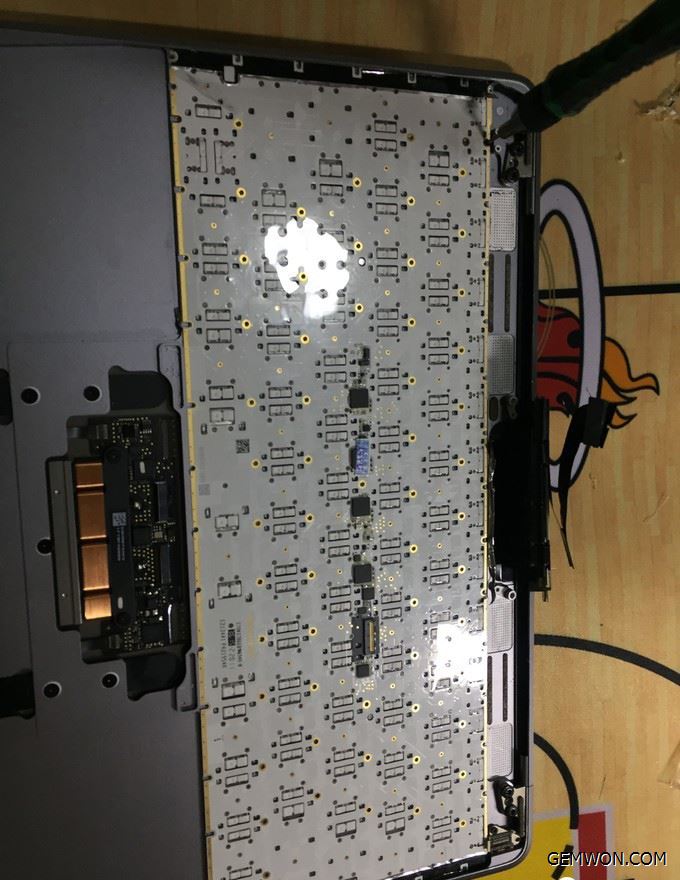
17. Remove the shielding cover from the back of the keyboard. It is recommended to use a hair dryer to make hot air, blow it for 1-2 minutes, pay attention to avoid the motherboard, and easily uncover the shielding film.
18. Remove the screws and remove the screws that are visible on the keyboard. Basically, each key has a screw.
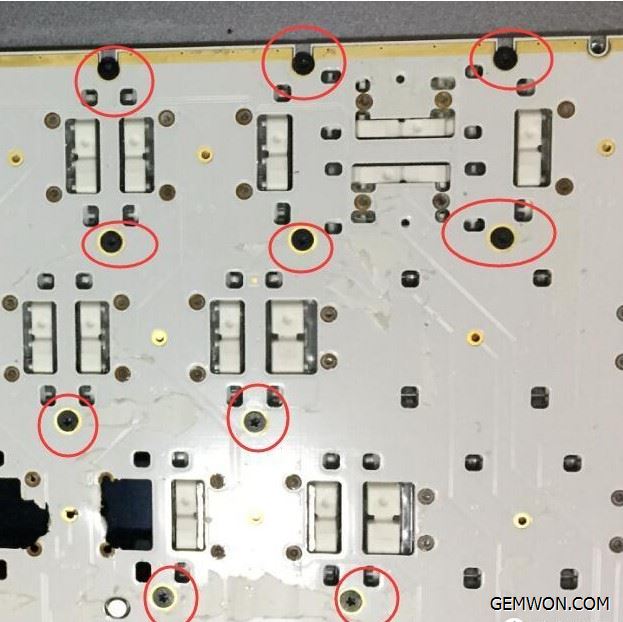
19. Pay attention to the process of screwing the screws. Do not cause damage to the screws. Refer to the article: How to Remove Damaged Screws from Laptop
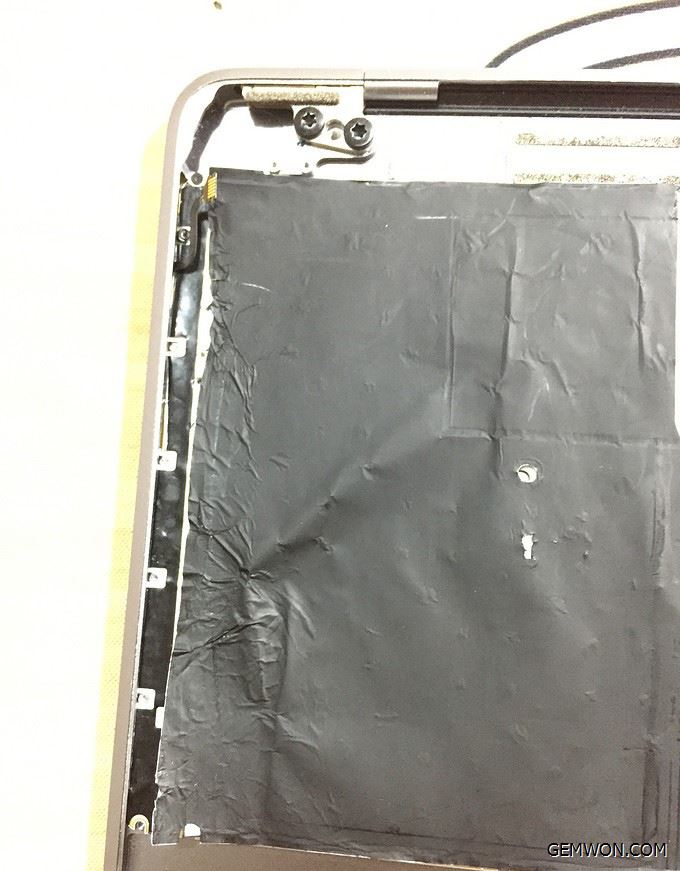
20. Carefully pry open a portion of the keyboard with a crowbar.
21. After removing it, remove the glue that sticks to it. Then you can change to a new keyboard. Once installed,install all the screws as they are.
22. Install the screws and install the shield. Next, install other parts as they are.
23. It is necessary to remember the position of each screw, because there may be different screws on the board of the Apple Mac. It is necessary to mark the screw position map or take a photo.
That's it, I took my MacBook to an Apple store and they confirmed that there was a water stain and that it took at least $399 to replace the keyboard.The spilled water on MacBook some keys not working can be done by myself at a cheaper price.
Related Articles:
How to Fix MacBook Keyboard not Working
How to Fix Apple A1466 MacBook Water Damaged
Easy Ways to Remove and Clean MacBook Keyboard Keys

